Showing posts with label kitchen tips. Show all posts

Monday, July 17, 2017

Freezing Food in Jars.Frugal - Kitchen Tip Monday

One way to save money in the kitchen is to make your own chicken broth or stock.  I purchased a package of split chicken breasts on sale and then simply boiled them with two things in mind.  Number one was to make chicken salad for lunches this week.  The second thing was to store the chicken broth.  At no extra cost, I now have 2 and 1/2 quarts of chicken broth!

Frozen Chicken Broth

Freezing things in glass jars is a new thing for me.  I've frozen chicken broth in freezer bags before, but that didn't work out too well.  It was kind of messy!  With the jars I can take a jar out of the freezer, set it in the fridge and use it as needed.  I really love the plastic lids that can be used on canning jars for storage.  I bought mine at Walmart, but you can also get them on Amazon HERE.

Tips for freezing chicken broth in jars:  1.  Leave some space at the top of the jar; 2.  Place the filled jars in the fridge overnight before freezing.

Homemade Chicken Salad
Having some items ready to grab in the morning for lunches is a real time and money saver!  I'm already envisioning some sliced summer tomatoes fresh from the garden with this chicken salad.

Homemade Sweet Pickles
These are some of my homemade sweet pickles.  Without these chicken salad isn't the same! My love and thanks go to my Mama for teaching me to make sweet pickles and chicken salad.  Also, I need to use the plastic lids on the pickle jars after they have been opened for storage in the fridge!

Have a great Monday and if its hot where you are, stay cool!

Wednesday, October 2, 2013

In the Kitchen With Debbie - More Saturday Morning Cooking

My new "go to" recipe for pot roast can be found HERE on the Pioneer Woman's Website.

These carrots and onions were browned before going into the pot.  I don't usually like carrots, but I  do like these after they completely cook with the roast.


Here I am searing all sides of the roast.


Here is our lovely roast right before putting it in the oven early Saturday morning.  I love to have time to really slow cook foods such as this roast.   Cooking on the weekend when I have more time, yields food that can be eaten all weekend and during the following work week.


Hints:  If you don't normally buy beef stock, you can use beef bullion cubes. 

Mashed potatoes or rice are a great side dish with this roast because of the wonderful juices that can be ladled over them.

I didn't use the fresh rosemary and thyme sprigs and it turned out just fine. 

Thursday, August 8, 2013

In The Farmhouse Kitchen - Day 4 - Thursday - Thrown Together Meals

Meal planning definitely saves time and money.  But, sometimes you have to just throw something together when cooking.  I guess a form of meal planning would be to have a list of meals that can be "thrown together" from what you have on hand.  At the bottom of this post is a list of possible ones.

Here are a couple of examples from my week.

Underneath all the cheese and Fritos in this bowl are delicious chili beans.  They are thick, FULL of hamburger, and wonderful for dipping with the Fritos.  The recipe is another one from PIONEER WOMAN, called FRITO PIES.  I was intrigued by her method of serving the chili in a Frito bag, but  instead of putting the chili in a bag of Fritos, I put the chili in a bowl and poured the Fritos around the edges.  That bag idea sure would be neat at a picnic or when tailgating though!

T
Chili Cheese beans Fritos
The reason I felt like this meal was thrown together is that even though I tried very hard to make a good meal for my hubby, unfortunately, he had to work very late that day.  The beans had been sitting in the pot on low for hours.  They got thicker and thicker.  They were not nearly has good as they would have been if eaten on time.

O.K, they were still good to eat, but by the time hubby got there I felt like I was just throwing them in a bowl with chips and cheese and saying, "Here you go!".  I wasn't too proud of my efforts at cooking.  I know you've been there before too.  You know how it is when you put your heart and soul into a meal and then it sits there for hours before its eaten.  The meal doesn't look or taste as good and you feel like someone has let the air out of your balloons!

And poor hubby ate leftover chili cheese beans for a couple of days!

Here is a weeknight meal from a couple of days ago.  We had bananas, tomatoes and leftover bacon that really needed to be eaten.  So we had banana sandwiches and tomato and bacon sandwiches.  It sure was good, but definitely a "thrown together" meal!


Banana Sandwich and Bacon and Tomato Sandwich with lots of black pepper
Sometimes a meal that is just thrown together turns out surprisingly great.  My mother used to say that she could always "knock up" something to eat from what she had in her cabinets. 

I decided to brainstorm "thrown together main dishes and sides" that can be made on the spur of the moment.  Here are a few:

Peanut Butter Sandwiches and canned soup, or your own frozen soup.
Pimento cheese on celery
Grilled Cheese sandwiches
Canned vegetables (corn, peas, beans)
Frozen Pizza
Chef's Salad
Breakfast for Supper (Fried or scrambled eggs, toast with jelly)
Vegetable soup using canned vegetables and hamburger
BBQ Chicken using bottled BBQ sauce.
Any meal that you have frozen
Meal Starters from the freezer, like frozen browned ground beef, can produce a variety of meals (tacos, spaghetti, chili, lasagna)
Baked beans
Pasta Salad
Meatless spaghetti using jarred sauce
French Bread or English Muffin pizzas
Baked potato Bar (potato baked in microwave) (toppings:  cheese, sour cream, butter, baked beans,etc.)
Canned clam chowder - Add extra potatoes, clams and milk.  Eat with saltines.  YUM.
Boiled eggs (deviled, in a salad, or alone)
BLTs, or BTs, BLs or LTs (LOL)
Any meal that uses fresh veggies from the garden (cukes, tomatoes, peppers, okra, etc)
Canned biscuits
LEFTOVERS!

I bet you have your favorite "thrown together" meals.  Tell me please.... I need more ideas.

Wednesday, August 7, 2013

The Farmhouse Kitchen - Day Three

Sometimes our harvest is small and kind of odd shaped.  But, small batch freezing and/or canning can really add up.  I have tried very hard to let nothing go to waste.

Odd shaped cucumbers, not ripe yet tomatoes and a bell pepper.

There's one okra pod cut into wheels in this bag! 

We have one grape tomato plant that has been bearing very well.  We have 3 okra plants that have just begun to bear.  I picked one okra pod on Saturday, and after slicing it into wheels, I threw it in with the grape tomatoes, when cooking them in preparation for freezing.  At least one vegetable soup this fall or winter will have a few bites of okra!

An Okra Plant
There were just enough of the regular size tomatoes to freeze one bag of tomatoes.
 
 
Canned or frozen tomatoes are beautiful:


Our three bell pepper plants are loaded with fruit that will need to be picked soon.  I plan to make stuffed peppers to eat now and some to freeze for later.  I will freeze them individually so that only the number needed will be used.


I have to confess that we have not been able to keep up with eating all the cucumbers we have grown.  I already have more than enough pickles.  We have eaten them marinated in vinegar and just plain in salads and also, peeled with a little salt and pepper.  We have given some away.  They are delicious, but there are too many of them.

In the Refrigerator Produce Drawer
There are still plenty of cucumber blossoms on the plants growing on this trellis.

 
The extras won't go completely to waste, though.  They will go into the lasagna/compost garden to help fertilize the soil there


Here's a new cucumber that came up in the lasagna garden from a discarded cucumber's seeds. There's plenty of time in our long growing season for it to produce before frost.


It has been amazing to see how much produce we have been able to get from our one raised bed garden.  I'm already excited about what we can grow next spring.  I'm also itching to plant some fall vegetables soon.

Tuesday, August 6, 2013

In The Farmhouse Kitchen - Day Two

Some recent from scratch cooking brought to my attention that the condition of my spice cabinet was pretty bad! LOTS of really old spices. Spices I paid dearly for and used only once. When I needed one of the spices that I use frequently, I was having a hard time finding it since they were all mixed up with the other ones.   It was just generally a mess!

Before

I brought over the kitchen trash can and started tossing.  It felt so much better to look into the spice cabinet afterward.  The small bottles of spices are in the basket.  See my cute mason jar salt dispenser?  I know there are lots of people with much more beautiful and organized spices, but this works for me.   I can turn the lazy Susan around to find what I need.  This cabinet is located to the left of, and right beside the stove.

After

I found some spices in there that I didn't realize I had and had planned to buy.  One was dry mustard and luckily it was still in date.

Then after church on Sunday I stopped by Dollar General and Food Lion and replenished my spices.  Dollar General has the best prices on basic spices, but you won't find many that you need there.  At Food Lion the spices are pretty expensive.  I couldn't find Cumin at Dollar General, so I looked in the Hispanic Food section at Food Lion and found a large bottle for only $1.39!  There was a huge selection of spices at great prices in this section.  I will check them out further when I have more time.  This is a tip given to me by Little Pen Pen.

Here's what I purchased at Dollar General.  Some of these things aren't spices, but I listed everything, just for informational purposes.

McCormick Meat Tenderizer - $3.00  (could probably find a better deal, but we don't use a lot of this)
Baking Powder (large can) - $1.15
32 oz Beef Broth - 1.60
Paprika - $1.00
Lawry's Seasoned Salt (large bottle)- $1.95
Oregano - 1.00
Parsley Flakes - $1.00
Vanilla Flavoring (imitation) $1.00
Cream Soups - 50 cents

I love that now I can find what I need much easier when cooking.  When I am making a new recipe, I know whether or not I have all the spices called for.

Here are some good "stock up" deals I found at Food Lion: (prices good through today)

My Essentials Peanut Butter, 1.16 each (bought 4) (Some will go in our emergency food storage and some will be donated to the food pantry)
28 oz cans of crushed tomatoes - $1.00 each (bought 4)
VanCamps pork and beans - 47 cents each (bought 4)
Bush's Great Northern or Pinto Beans 50 cents each (bought 4)
Pompeii Olive Oil - $6.00 (bought 2) (this will last us for a long time!)
12 oz sandwich ham - $1.64 each (bought 4, the date is good through October)
3 lb yellow onions - $1.79
2  16 count packs of Borden sandwich cheese $5.00, get a dozen eggs free.  Eggs are $1.87, so after deducting that, each of the 3 items were $1.04 each.  One pack of the cheese is pepper jack flavored and the other is sharp cheddar.  We can always use eggs and cheese, so I considered this a good deal.  The use by date of the cheese is a very long time.  Eggs are good for 4 to 6 weeks after their use by date, so we will have no problem using them.

My goal is to stock up when the prices are at their very lowest.  I don't think you will find peanut butter much lower than $1.16 each very often.  Then we can go shopping in our pantry, instead of buying things as needed at the grocery store at full price.  I am also slowly putting together a price book so my middle aged brain can keep up with what actually is a "stock up" price!

Soon, I'll be doing a post listing my "stock up" prices.

Monday, August 5, 2013

The Farmhouse Kitchen - Monday

I've been working diligently on meal planning and trying some new recipes.  Keeping up with what we have in the freezer and pantry and what needs to be cooked is an ongoing opportunity to save money.

Every year we are given several containers of blueberries.  I also noticed that the snack drawer was bare.  So I pulled out the last two containers of blueberries that had been languishing in the back of the fridge on their last leg, and made a Blueberry Crumb Cake.


The blueberries were put to use and there are some sweet snacks in the house now. 


Blueberries are good for you, but we won't dwell on the amount of butter in this recipe!  Click on this link to see the recipe.  PIONEER WOMAN BLUEBERRY CRUMB CAKE.


Oh my, it was delicious with vanilla ice cream!  No picture with the ice cream, but this picture tells the story of the yumminess!


I sliced the cake into individual squares and refrigerated some for use this week.  I froze a couple of pieces for lunches later. 

Notes about the recipe:

It calls for whole milk, but I only had 2%.  It seemed to work fine anyway.

The crumbs on top for me weren't crumbly.  I think I either didn't use enough of the dry ingredients, or a little too much butter.  It tasted great, but just wasn't crumbly.  I'll adjust this next time to achieve the desired results.


Making the cake, combined with freezing tomatoes, made a little mess!  I cleaned it up right away, I promise!


I worked in the kitchen, cooking, organizing and planning this weekend, and I'll be posting more about it as the week goes on.

Monday, July 22, 2013

Another Mason Jar Magic Trick

A Mason Jar Salt Box:

I got this idea somewhere on the web. Just cut the top out of an ordinary cardboard salt box. Using the inner jar lid part as a pattern, trace around it and trim. It will be a perfect circle that fits perfectly on top of the jar with the ring holding it on.  Then just cover it with paper, fabric or you could just leave it as is.


Put some salt, or other shakable product, in the jar, put the lid on top and tighten down the ring. It looks much nicer than the cardboard salt box sitting in your cabinet or on the counter.


Some ideas I have for these would be for powdered parmesan cheese, pepper and sugar.  A cute spice set could be made using the really small mason jars with nice labels.   They would work well for measuring because you could slowly pour the contents into a measuring spoon or cup.

There are so many uses for Mason Jars.  I saw that the aqua blue ones are for sale again.  If I see any of them, I just may have to splurge on a few.

Thursday, March 29, 2012

The Calzones

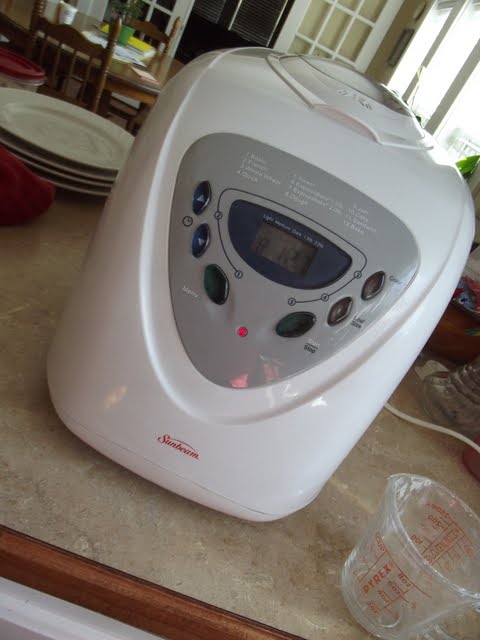
My hubby has mentioned to me that I never used the bread machine any more and then I saw THIS POST on Rhonda's blog. So,I got the bread machine out and made some calzones.

It took me a few minutes to figure out where I had stored the bread machine! But now it sits on the counter.


I wanted to use what I had on hand, so I simply browned some hamburger and bell pepper for the main ingredient. I opened a small can of tomato sauce and added some Italian seasonings to it. Then I put 1/3 cup of the hamburger mixture, a couple spoonfuls of the tomato sauce mixture and some cheese on the dough circles. Some of the calzones got Cheddar cheese and some got mozzarella cheese.

I also had all the ingredients for the dough on hand. You can see the recipe in Rhonda's post.


I agree with Rhonda that the dough was easy to handle. After putting the filling on the dough, I covered them and let them rise for 30 more minutes.

They got big!


Yum! Good. Can't wait to try some other mixtures. Ham and cheese comes to mind. Just might check the "Hot Pockets" at the store to get more ideas for fillers.


Thanks Rhonda for giving me the motivation to use the bread machine again. DH was happy!

Thursday, June 2, 2011

From Mug Rugs to Frying Pan Rugs

My hubby does almost all of the kitchen clean up at our house. I do almost all of the cooking. It works out great because he is very good at loading and unloading the dishwasher. In fact, he's very particular about it and will come behind me and rearrange the dishes and silverware if I try to do it myself.

So, it came as no surprise when he requested me to make some frying pan rugs to go between our set of three teflon coated frying pans. He read somewhere that you should put something between them to prevent the ones on top from scratching the ones underneath. He has been using paper towels, but a folded dishtowel or a dollar store potholder would work too.

I made our frying pan rugs just like mug rugs, except they are round and I used store bought extra wide bias tape for the binding. I need more practice on sewing on the bias tape, but these turned out great for our purposes.


First I machine meander quilted a square and then I used plates in the two sizes needed to mark the shape of the bottom of the the two frying pans. Then I cut out the circles with scissors. The bias tape was sewn on totally by machine.


This was a quick project and made my hubby very happy. Hopefully this will add to the life span of our frying pans.


Yes, I know my hubby is a keeper!

Friday, June 18, 2010

In The Kitchen With Debbie and Food Lion Deals


Just so you'll know, I grew up on a tobacco farm in the South and we did not grow or cook with fresh herbs. I'm sorry, but that's the truth. We grew and ate butter beans, corn, garden peas, field peas, cabbage, collards, chickens, pork and things like that.

Yesterday I cooked a dish using the first fresh basil that I grew myself. Isn't it beautiful!!!!??? I checked at the grocery store and a package containing about the same as the above small amount cost $2.00!

Its Pasta Primavera... Am I not getting fancy?


I looked up Pasta Primavera to make sure I really cooked it! Its an American-Italian dish containing pasta and fresh vegetables. In addition to fresh basil, my version contained mushrooms, garlic, broccoli, chicken, penne pasta and grated Parmesan cheese. The next time I cook it, I will use zucchini and bell pepper.

My plate sitting in the late afternoon sunshine.


For those of you that live in areas with Food Lions:

I got some great Food Lion deals yesterday. The cheese was free after using a Food Lion $2.00 coupon; the pasta was 15 cents after using a $1.00 Food Lion coupon; the eggs were 42 cents after using a $1.00 Food Lion coupon.

You can print these coupons HERE and HERE.


If you haven't already signed up for the Food Lion weekly newsletter, you really should. It always includes some pretty good coupons and what I like about it is that they are for produce, meat, eggs and other basic grocery items that you don't normally get coupons for.

There's a three day sale at Food Lion this weekend that I plan to hit. The best deals are 12 packs of Cottonnelle toilet tissue for $4.99 and Arm and Hammer Laundry detergent for $1.99.

Tuesday, March 3, 2009

A Small Start to Freezer Cooking

This past weekend I made these healthy and delicious apple muffins:


(Note more chicken items shamelessly included in photo)

The recipe makes 18 muffins, which was too many to eat before they spoiled, so I flash froze half of them like this so they would freeze separately. I just placed the cooling rack with the muffins on it right on top of some other frozen foods in the freezer. I also didn't want to make a double batch for freezing until they passed the taste test!


As soon as they were slightly frozen, I transferred them to this freezer bag and returned them to the small freezer above the refrigerator. Now members of my family and I can grab one as needed. We can either heat one in the microwave or just put one in our lunch where it will thaw by lunchtime.


Now that I have tested and approved the recipe I will make a double batch next time for freezing purposes.

Here is the recipe which I received in a Denise Austin Diet and Exercise Newsletter:

Double-A Applesauce Muffins

Ingredients:

1 3/4 cups whole-wheat flour
2 teaspoons baking powder
1/2 teaspoon baking soda
1 teaspoon ground cinnamon
1/8 teaspoon salt
1/2 cup fat-free plain yogurt
1 large egg
3 tablespoons brown sugar
2 tablespoons canola oil (I used regular vegetable oil)
2 medium Golden Delicious apples, grated
3/4 cup unsweetened applesauce
1/2 cup currants or other dried fruit in small pieces (I used golden raisins)

Preparation:
Preheat the oven to 375. Coat an 18-cup muffin tray with cooking spray. (don't use paper liners). In a large bowl, stir together the flour, baking powder, baking soda, cinnamon and salt. In a medium bowl, whisk together the yogurt, egg, brown sugar, and oil until smooth. Stir in the apples, applesauce and dried fruit.

Pour the apple mixture into the dry ingredients and stir until just blended. Spoon the batter evenly into the prepared cups, filling them nearly to the top. Bake for 20to 25 minutes, or until springy to the touch and lightly browned. Turn out onto a wire rack to cool. Makes 18 muffins.

Per muffin: 100 calories, 19 g carbohydrates, 2 g protein, 2 g total fat, 10 mg cholesterol, 3 g dietary fiber

So to sum up my kitchen tip for this week:

1. Start out small with freezer cooking
2. Test the recipe first before making large batches for the freezer

You can read many more kitchen tips at Tammy's Recipes.

Tuesday, February 24, 2009

Husbands in the Kitchen

Happy Fat Tuesday!

Today is Kitchen Tip Tuesday at Tammy's Recipes, so be sure to check out the wonderful kitchen tips posted there.

Sunday I posted about how my hubby gave me a wonderful birthday celebration. He found recipes on the Internet and printed them out:


He made a "big" grocery shopping trip, after clipping coupons and taking inventory of our pantry and food cabinets. He was in the kitchen Sunday morning at 6:00 A.M. and worked on everything until mid afternoon, which included cleaning up. You can see more about my day in the prior post down below this one.

My tip for today is this: If your husband shows an interest in cooking, encourage him to be creative in the kitchen, be available if he needs help, and then show him that you admire and appreciate the fruits of his labor.

I want to thank my hubby and say, "Honey, it was great!"

Here are the links for the recipes he made:

Herb Roasted Pork Loin


Twice Baked Sweet Potatoes


Broccoli Casserole


Mixed Vegetable Casserole

Sorry, I didn't get a picture of this, but it was very appealing to the eye, trust me.

The meal also included my hubby's grandmother's recipe for cole slaw, a big plate of crescent rolls, a plate of pickles, and a birthday cake!

Tuesday, January 27, 2009

Decluttering Kitchen Cabinets

Today is Kitchen Tip Tuesday so please go to Tammy's Recipes for more kitchen tips.

I wanted to finish showing you some of the kitchen cabinets that I have organized.

My main tip in this process is to eliminate and concentrate! I have made sure that ONLY THE KITCHEN ITEMS that I use on a day to day basis are front and cener in all of my cabinets.

This picture shows one of the cabinets with pots and pans. These are the three frying pans I use most. These pans are pretty old and stained, but they still work great. :o) I Need to add scrubbing and soaking their outsides to the list! Maybe new ones will be on my shopping list soon. Just keeping it real for you!

In the back are two pots I use almost every day. I had an old plate rack that works perfectly for lids. Above all this on the shelf is the George Foreman Grill. Its big and heavy and I don't use it all that much. This shelf is large enough for it and yet its still easy to get it out when needed. I placed the two large frying pan lids on top of that for convenient storage.


This picture shows the two larger pots, two small pots and two colanders that I use nearly every day. Behind the two large pots is the crockpot. I don't use this every day, but do use it at least once or twice a week. Its in a convenient spot, but not in the front.


This is the corner cabinet where I store every day plates, bowls, and miscellaneous items. In the front are the ones used daily. There are many items that we don't use all that often in the very back of each shelf. I can still get to them if I need them without too much trouble, but the ones we use every day are easy to just grab and go. I used one coated wire shelf to separate some bowls and small plates.


It is amazing how much more I enjoy cooking and cleaning up the kitchen now that things are more organized and streamlined.

You can see other "after pictures" of my kitchen cabinets on the side bar.

Have a great Tuesday!

Monday, January 19, 2009

Do Ahead Cooking


Its Kitchen Tip Tuesday at Tammy's Recipes, so be sure to visit Tammy's blog for more tips.

Up until now I've not been a fan of freezer cooking, but would like to do more "Do Ahead Cooking". And, if I can find some foods that I actually like after they've been frozen, I'd love to do some freezer cooking.

I got this book from the library and it has inspired me to get better organized with my cooking.... again. I'd like to try some of the recipes or adapt some of my own. This book tells you how to cook each food, how to store it and how to reheat it for a later meal.

I used some of the concepts in the book to "Do Ahead" my Sunday Dinner this past Sunday. I was having family over for this meal and wanted to have a good meal, while at the same time keep the preparation of it stress free.

My Menu:

Mexican Chicken Casserole (recipe below)
Sweet Potato Clouds (recipe below)
Broccoli and Cheese
Biscuits
Chocolate Cake

The work I did before going to church Sunday morning:

1. Actually, I boiled the chicken breasts on Saturday, cooled them and deboned them. I put the chicken in the fridge until Sunday Morning. Then I completely put the recipe together in the casserole dish, covered it with plastic wrap and placed it in the fridge.

2. I followed the recipe and storage instructions for the Sweet Potato Clouds, which included peeling and boiling them, mixing up the recipe and placing them on the cookie sheet to be completed when I got home from church. The instructions for "Doing Ahead this recipe" is below.

3. I made the cake layers and left them to cool on racks.

4. I made a gallon of tea.

5. Hubby set the table.

The work I did to complete the meal after getting home from church:

1. Put the casserole in the oven for 30 minutes.

2. Brushed the Sweet Potato Clouds with melted butter and baked them for 15 minutes.

3. Put the cake together on a pretty glass cake plate and put the store bought frosting on it.

4. Cooked the steam in the bag broccoli and cheese in the microwave oven.

5. Cooked the frozen, store bought biscuits in the oven.

The meal was great and everyone loved it. Best of all, I got a delicious meal on the table without a lot of stress.

MEXICAN CHICKEN CASSEROLE - Recipe from Paula Deen's The Lady & Sons Cookbook

(Click on picture to make it bigger)


I used two cans of cream of chicken soup instead of the cream of mushroom soup.

Here's what the chicken mixture layer looked like.


I cut my flour tortillas into strips like this. The strips are the first and last layer of the dish.


The last step: The cheese


Then just refrigerate until ready to bake.


SWEET POTATO CLOUDS

(Click on the picture to make it bigger)


I plan to implement more of the recipes in the "Do-Ahead Cookbook" in the near future. I'm bound and determined to start doing some freezer cooking. I think cooking two batches of a meal and freezing one is the most efficient way to do this.

Glimpses of Home - first quarter of 2021

I made a list of my 2021 goals that I wrote down in the back of my planner.  Its time to review that to see how I am doing! But, here are a ...